A seller's apothecary backpack made for Steampunk summer festivals. Inspiration taken from the Victorian era and fantasy sources.
Wood, metal, leather, mechanical parts, wire, tubing, glass.
All the materials I used for this costume, I found in my Gran's cellar.
Wood, metal, leather, mechanical parts, wire, tubing, glass.
All the materials I used for this costume, I found in my Gran's cellar.
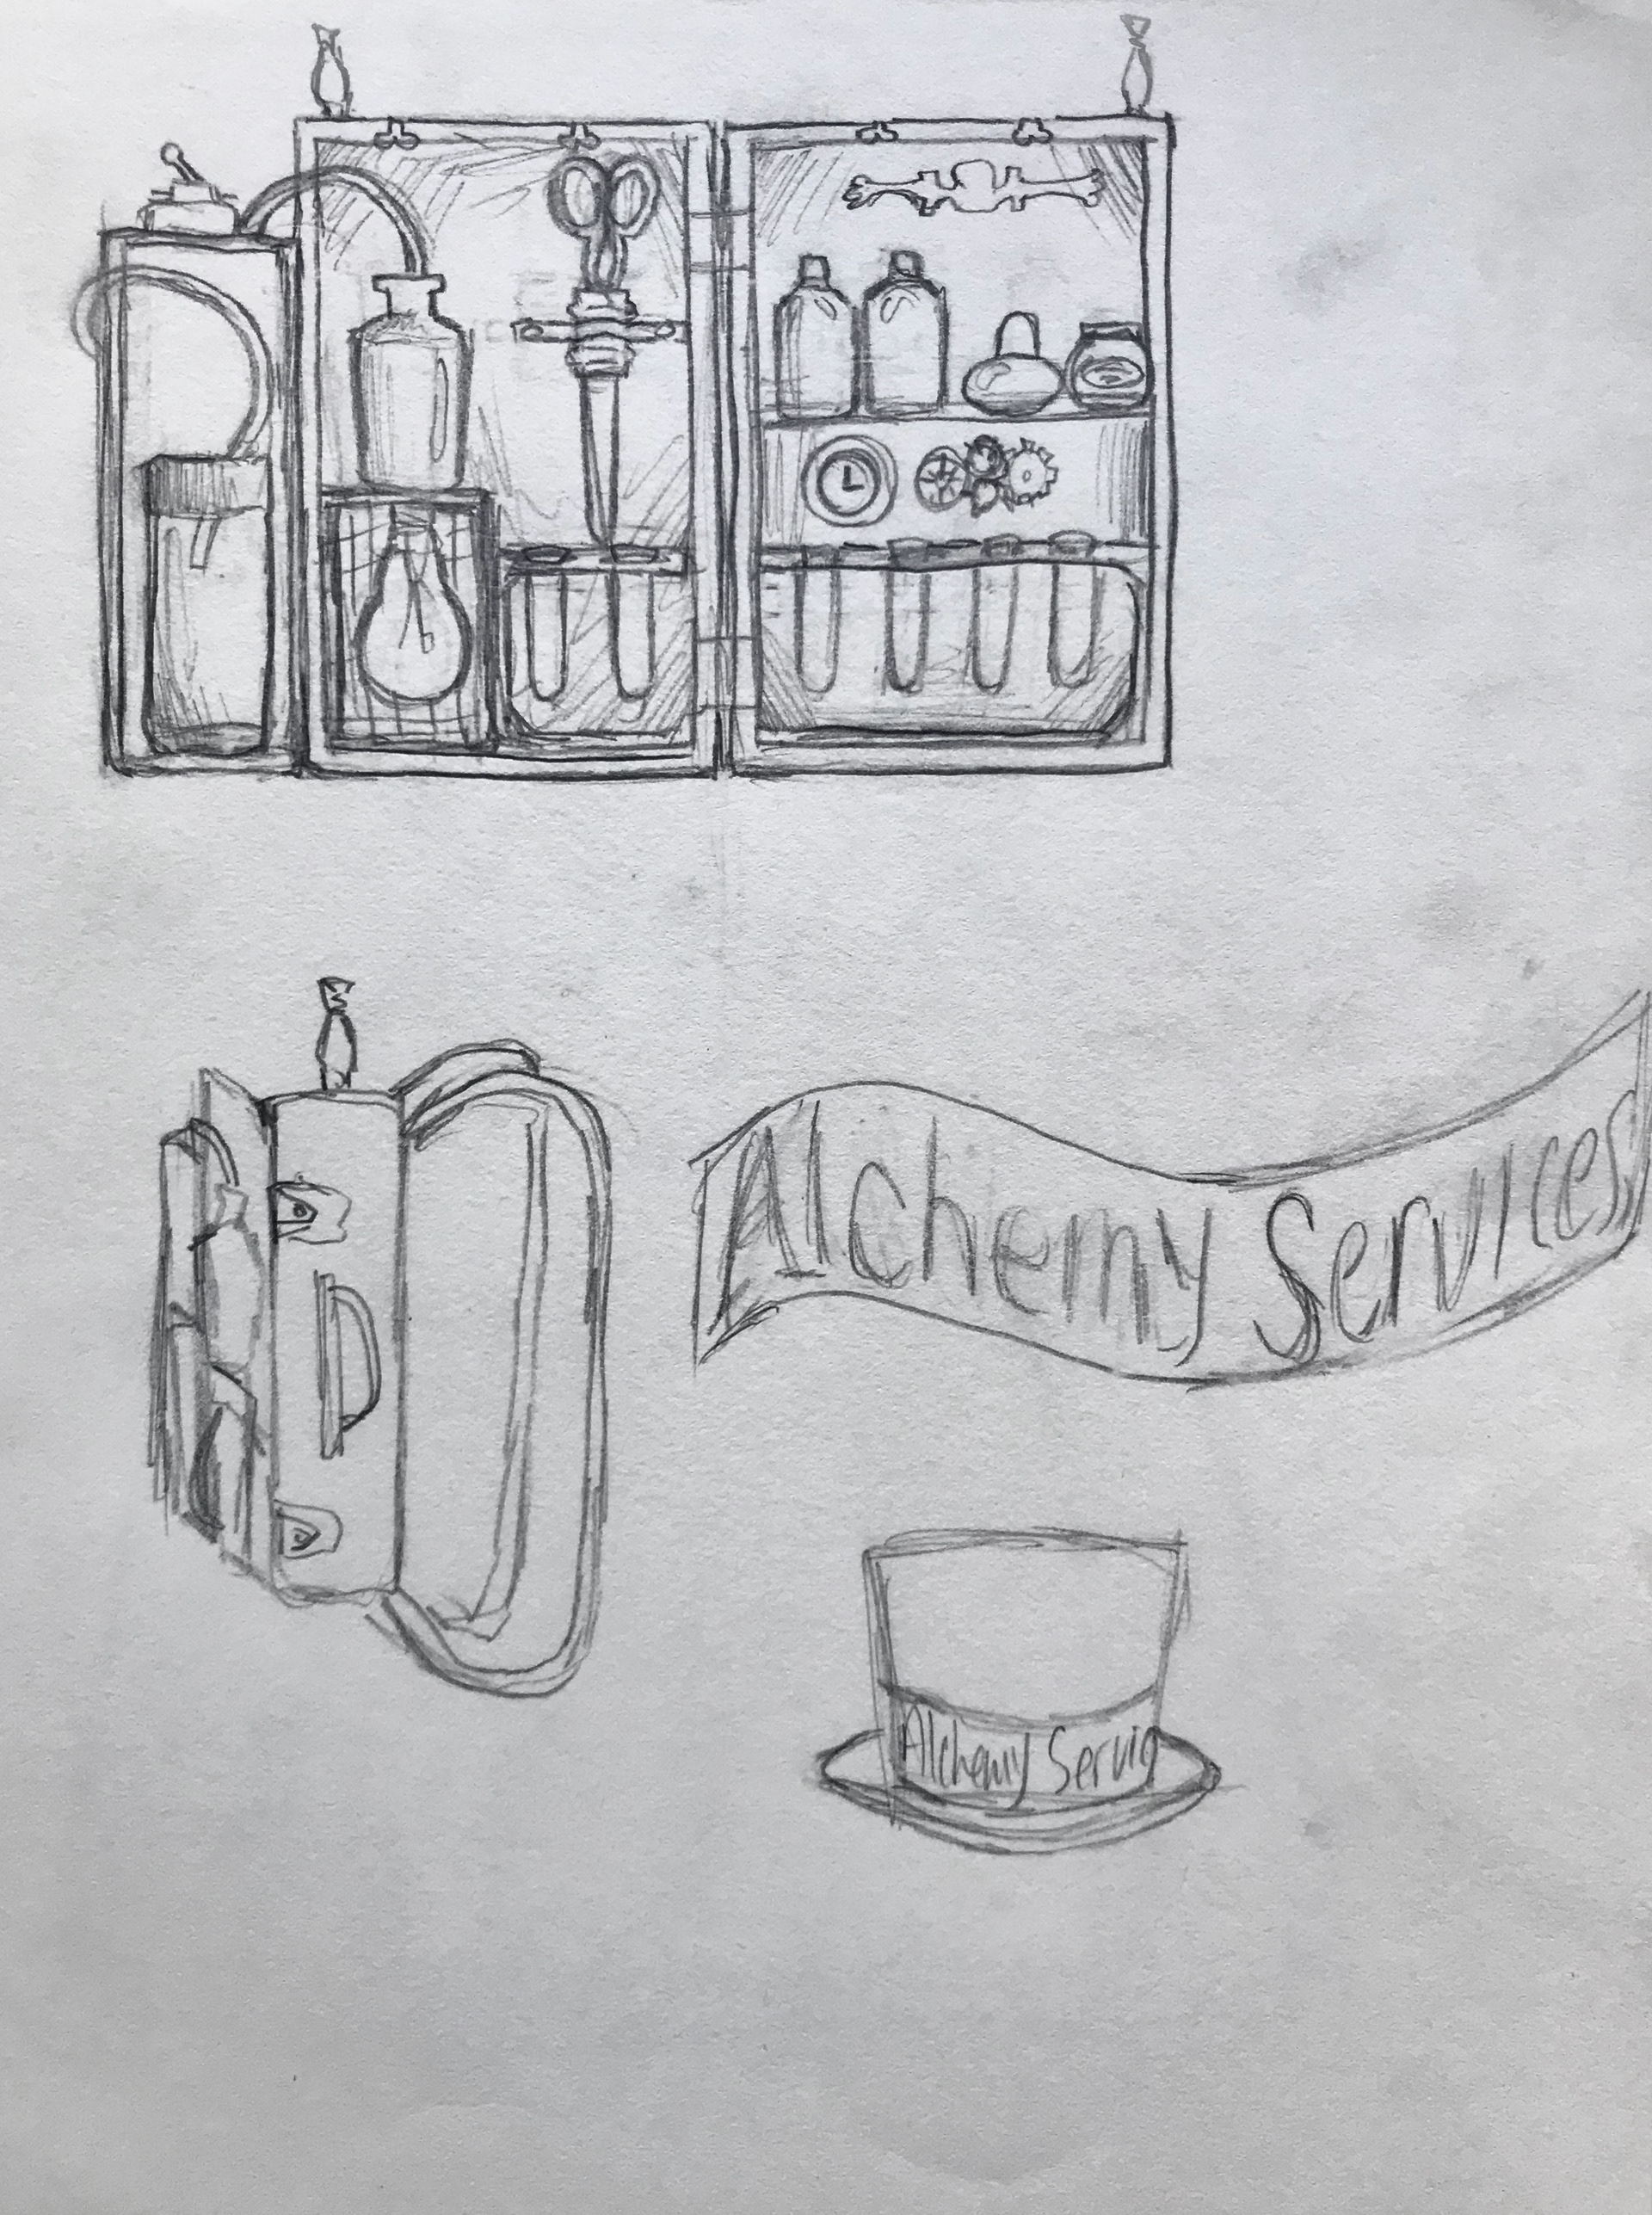
This is the original sketch for the design of Magnus Elixr.

1. I found a wooden tool box, wooden spice rack, small wooden crate, a myriad of bottles, an industrial switch, copper pipe, wire, metal decorations, mechanical parts, and tubing in my Gran's cellar. Immediately I saw this idea coming into place.

2. I lightly sanded the wooden tool box and coated it in a wood stain. After the stain had dried, I cut the spice rack to the exact size of the box and wood glued the pieces in place along with the small wooden crate. These would hold the bottles like in my design.

3. I sat the tool box upright and made sure that the bottles fit on all levels of the new shelves.

4. I removed one end of the crate and added a metal plate with a hole in the center for the tubing. The bottle on the side, previously a parmesan cheese container, now had wooden edges made from wooden strips. I glued the industrial switch to the top and put the tubing through one of the holes in the lid.

5. At this point I needed to make the decorative pieces. From the broken clocks I had found in the cellar, I took apart the inner pieces to use for the classic industrial Steampunk look. The smaller pieces would later be used to create an eyepiece for my outfit.

6. I used bronze acrylic paint to make the colour of the bottle's caps uniform.

7. For the bottle's labels, I printed out the text and rubbed the paper with tea bags to give it an aged look. I then cut out the labels and decorated them more with pen.

7. Next, I needed to create holders for the two biggest bottles on the pack. Using a leather puncher, I created holes in the strips of leather where I would screw them into the wood of the box. On the side pieces of leather, I added a wire seat for the container to securely sit in.

8. To hold the stiff tubing in place, I soldered the wire to screws and wrapped it firmly around the copper pipes that the tubing was held by. I screwed the metal decorations and the pressure dial at the top right of the pack. On the back of the box I screwed metal plaques to ensure the box would not open or close. On the shelves, I soldered wire to some nails and places it across the opening to make sure any bottles would not fall out. The top shelf has leather across it instead.

9. At this point I could add the bottles to the box to see how it looked. Everything fit perfectly and all the pieces were secure. Not pictured is the thin pillow and fabric I added to the back of the pack for comfort. Because the wood of the box was thin, there were some tips of the screws that poked out on the other side, and the pack would have been extremely uncomfortable to wear with bare wood against my back. I used screws and a staple gun to place the pillow against the wood and then cover the entire back of the pack with a faux leather. This is the point where I also screwed the straps of the pack into the back of the box.

10. For the final details of the outfit, I created an eyepiece from an old camera lens and the small watch pieces that I had taken apart. I fastened this eyepiece to my real glasses with wire so I would be able to see properly at the same time as adding an extra affect to my costume.

11. Using bronze paint, I spelled out the name of my character's business. This woul be tied to the two little posts I glued to the very top of the pack.

12. For the apron, I used faux leather and sewed the holders for the glass vials.

13. Finally, I filled the bottles with a mixture of food colouring, oil and water. The glasses would have fallen if I did not glue them, so after I filled them with the "Elixir" liquid I glued the caps of the bottles shut and then glued the bottles down to the wood of the shelves. This was also because I knew this costume could be worn again and the liquid wouldn't have to be removed after. The yellow liquid in the crate was intended to look like an oil burner, heating up the bottle above it.
